| Getting Started |
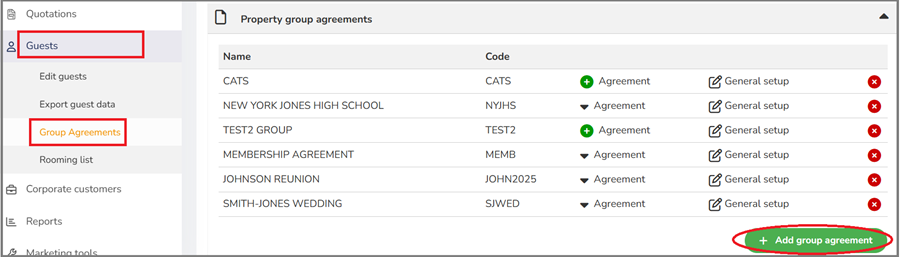
| Go to Guests > Group Agreements. Click the green "+Add group agreement" button. |
 |
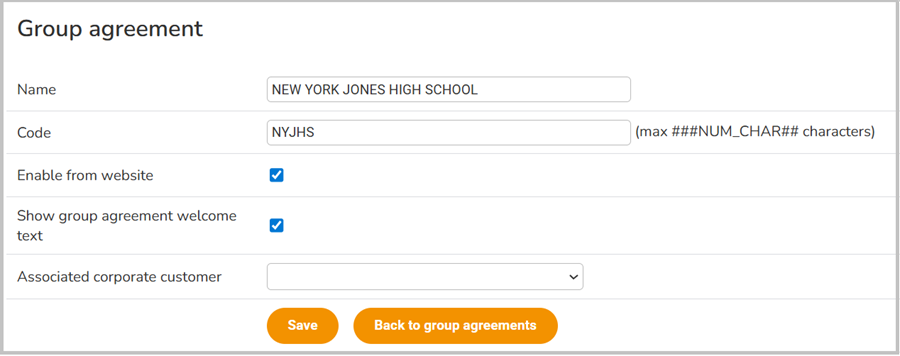
| The Group agreement window will open. |
 |
|
Enter the Name of the group.
|
|
Enter the group Code. This code must match exactly the group code in Execu/Suite PMS.
|
|
Check "Enable from website" if guests may book rooms from your website. If this is for a GDS or OTA only, leave unchecked.
|
|
Click "show group agreement welcome text" if you would like verbiage specific to this group to display. For example, "Mary Smith and John Jackson Wedding".
|
|
Click "Save" then "Back to group agreements".
|
| |
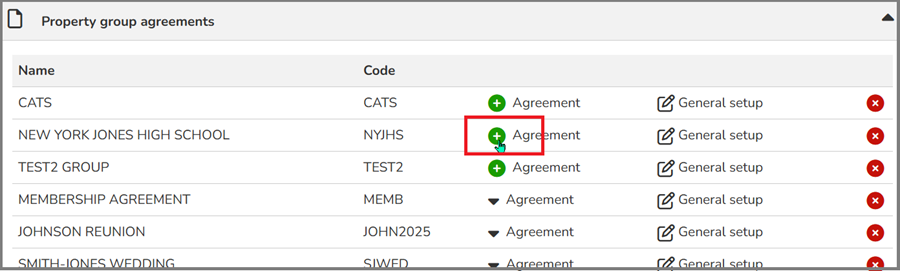
| Next, from the 'Property group agreements" list, find your group and click the green "+" beside "Agreement". |
 |
| |
| Next, click the green "+" beside "New contract". |
 |
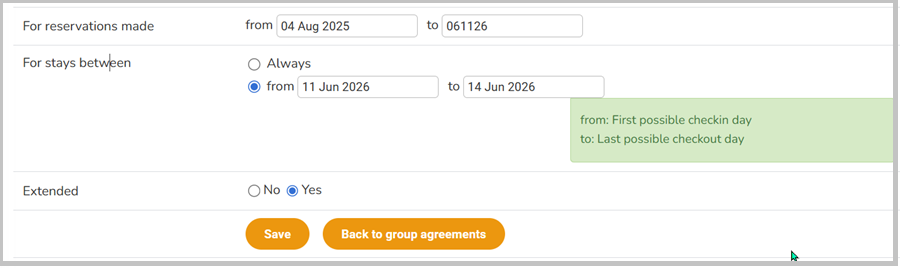
| The following window will open: |
 |
|
"For reservations made" enter the date range that guests are allowed to make reservations for this group.
|
|
"For stays between" click "Always" if guests from this group can arrive any date that availability exists. This is uncommon. More commonly, you will click "from" and enter the date range that guests are allowed to stay for this group. Enter the first possible arrival date, even if most of he group will arrive at a later date. Enter the last date the group will check out.
|
|
Click "Yes" for "Extended" if guests are allowed to reserve rooms outside of the range.
|
Click "Save" and then "Back to group agreements".
|
| |
| You will return to the group agreement page. Click the "Validity" edit icon to make changes. |
 |
| |
| Click the "Agreement" edit icon. |
 |
| The "Group agreement" page will open. |
| The first section is "General setup". |
 |
|
The information you already entered will display.
|
| Click "Group agreement welcome text" if you wish the group name or other verbiage to display for the group online. |
| |
| The second section is "Connected products (Rate Types)". There are three tabs. |
| The first tab is "Only group agreement products". These rates are available only to groups. |
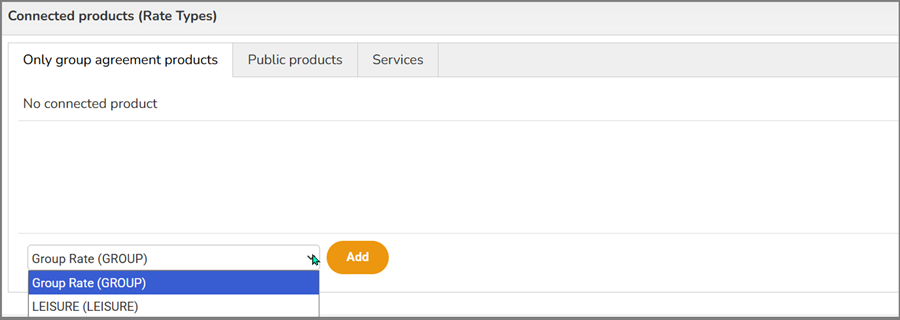 |
| From the drop-down, select a group rate if you wish it to apply to the group. Click "Add". |
| |
| The second tab is "Public products". These are available to the public, not just to groups. |
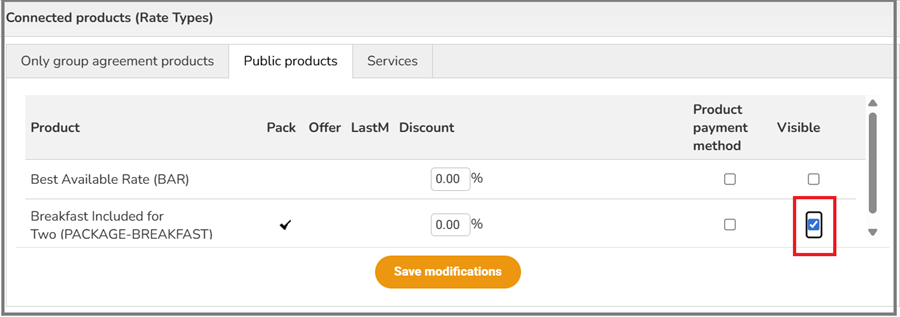 |
| Available public products/rates will display. Click "visible" for this product/rate to be available for this group. |
| |
| The third tab is "services" such as meals, spa, tours, etc. Note that these are add-ns, not part of pre-set packages. |
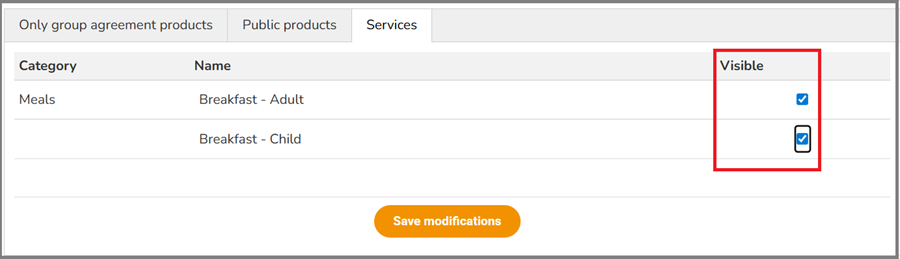 |
| Click the box under "Visible" if you want that service available to the group. Click "Save modifications" |
| |
| The next section is "Allotment". This will be discussed in the next section, Adding Inventory - Room Allotment |
| |
| |
| Back to top |